You are currently browsing the tag archive for the ‘Bathroom’ tag.
Our bathroom is finally complete. I know I never thought I would utter those words and I’m sure you didn’t either. As I hope some of you saw, little ole Out of Square was featured on Kara Paslay Design earlier this week and I used that opportunity to debut our bathroom. If you missed it, here is a little peak about what I shared.
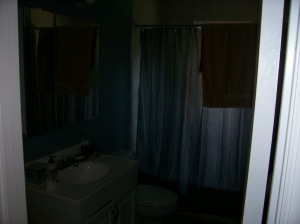
 The devestating before.

The beautiful after.
So what do you think? Did we hit it out of the park?! Ok, if your response is no, then don’t answer. I like living in my little bubble of bathroom love. We are so proud of all the blood, sweat, and tears that went into the darn thing. We were able to DIY the entire thing. From the vanity, to tile, to reglazing the tub. All done with our own two hands. I’m not sure that you want to hear all the laborious details but if you do, just give me a shout. I’m always happy to share!
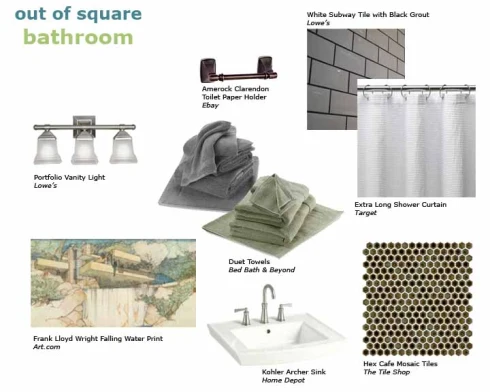
Since I did receive a few questions regarding where some of our items in the bathroom came from, I figured I would follow up my guest post with a nice little source list. Here are the ins and outs of our bathroom:
-
Paint above chairrail: Valspar – Winter Flannel
-
Chairrail paint: Glidden – Meeting House
-
Vanity: Custom built by the hubby; painted Glidden – Meeting House
-
Sink: Kohler – Archer, Lowes
-
Faucet: Kohler – Archer, Lowes
-
Toilet: Kohler – Archer, Lowes (and no we did not pick them all out because they were from the same collection. It was actually a happy accident :))
-
Floor Tile: Hex Cafe, The Tile Shop
-
Shower Tile: White Subway Tile, Lowes – Black Grout
-
Shower Curtain: White Xtra Long Waffle Curtain, Amazon.com
-
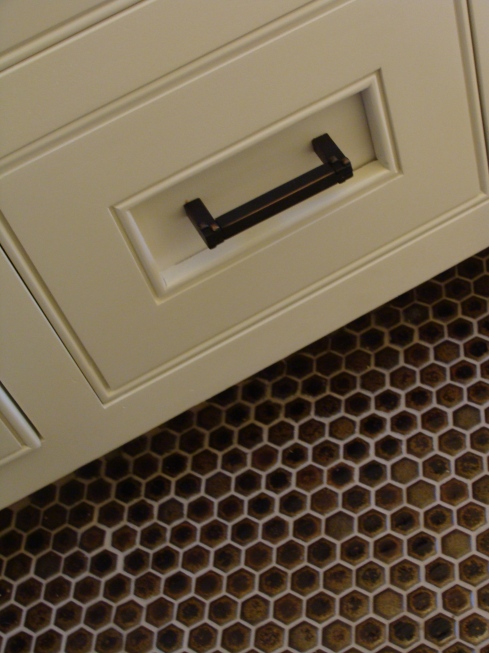
Cabinet Hardware: Emtek Arts & Crafts Collection, Tenon & Mortise Pull & Hammered Vertical Ring
-
Soap Pump: Target
-
Hand Towels: Tile Bath Towels, Bed Bath & Beyond (Color: Chocolate)
- Bath Towels: Duet by Royal Velvet, Bed Bath & Beyond (Colors: Thyme & Slate)
- Towel Bar: Amerock – Clarendon 18″ Towel Bar
- Mirror: Lowes – Moen Mirror
And here are a few more pictures just for the fun of it. Enjoy!


“Mommy, Wow! I’m a big kid now!”
Yep, straight out of a huggies pull-ups commercial but thats how I felt as soon as the vanity for our bathroom was complete. Not only is the new vanity more than 18″ deep, it’s also fully equipped with a brand new Kohler sink and faucet. We have enough storage to hold all our toiletries, extra toilet paper, and anything else we darn well please!! I love this vanity so much I could sing a song about it. I won’t but I could.
Here’s a friendly reminder of the vanity we had before. This one came with the house and seemed to be the perfect size…for a 6 year old. Please excuse the old crooked picture.
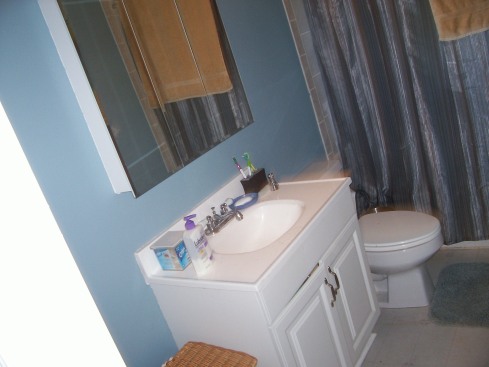
And here is the new beauty!
My lovely millworker of a husband built this bad boy. (Thats him in the mirror, please excuse his confused sleepy expression. I obviously haven’t perfected my photography skills yet.)
There’s a shot of that stunning Kohler sink and faucet. Isn’t she beautiful?! Wes and I worked together to design the actual vanity and then I let him roll with it. With his trusty (which translates to gigantic) miter saw in tow, he cut every square inch of this vanity and pieced it together to create this masterpiece. OK, I’m gushing but I really love it that much. And to top it all off, my husband built it.
The hardest part of the vanity project…ok, not the hardest because I’m sure the actual building was the hardest but I didn’t help with that…so, the hardest part of the vanity project for ME was selecting the hardware. We decided to mix brushed nickel and oil rubbed bronze in the bathroom since we already had a lot of brushed nickel and the oil rubbed bronze would really bring out the chocolatey goodness of the mosaic tile floor.
We finally found these craftsman inspired pulls at a local hardware store. We instantly knew that these were the ones but the pricetag didn’t quite agree with us. We needed a total of (3) ring pulls and (3) drawer pulls which came to a whopping total of almost $100. No ma’am! We decided to leave our dream pulls behind and turn to our trusty friend Google and once again he didn’t let us down. We jotted down the name of the hardware while we were at the store so we knew exactly what to search for. Thats when we found the same pulls for 1/2 the price!! Needless to say we ordered them immediately and haven’t looked back since. Here are the drawer pulls and ring pulls.
So what do you think? Is my husband awesome or what? Maybe your husband is just as awesome and has built something for your home. Do tell!
P.S. For anyone who’s husband isn’t quite as handy, my husband takes on freelance work. So don’t hesitate to contact us about any future furniture/built-in project you have in mind but don’t quite have the tools to tackle yourself.
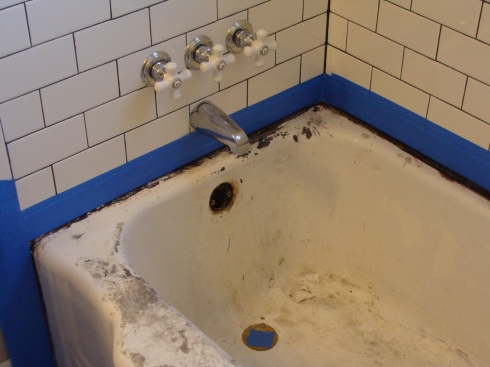
This is our tub.
Yep, we actually bathed in that thing. Well to its defense, it is a wonderful cast iron tub original to our 50’s bungalow but boy was it looking shabby! Lots of people asked us why we didn’t just want to replace it and to tell you the truth, it probably would have been easier and cost about the same as refinishing but they just don’t make ’em like they used to anymore. The tub is a wonderful size, super deep, and definitely sturdy. It really just needed a bit of a facelift.
Thats where my husband comes into play.
 The entire bathroom renovation has been a his and hers adventure except for (2) things. The tub and the vanity. Wes is a millwork finisher by day and the poor soul that has to deal with my never-ending to-do list by night. For those that don’t know, a millwork finisher is someone who focuses on the actual finish (paint, stain, etc.) of a cabinet or piece of furniture for example. Pretty much anything made out of wood. Wes currently works at an architectural millwork company here in Charlotte that has a marine interiors department. Obviously any woodwork on a boat/yacht that may be outdoors has to be treated differently. Thats where the connection between our bathtub and his job begins. In order to protect certain wood pieces on a yacht and the actually yacht itself, they use an epoxy resin as the topcoat. This epoxy provides an almost indestructible layer to protect the millwork and furniture from the water and sun.
Light bulb moment! Our bathtub has to stand up to water…hmmm…if epoxy resin works for boats then it certainly should work on our bathtub! And it does.
Wes started the tub refinishing by prepping the surface. This may be the most important step of all: removing all the previous finish. If the previous finish is not removed it could continue to peel and therefore cause the new finish to peel off. All your hard work later will be down the drain (pun intended!) if you don’t prep the surface properly.
 After the previous finish was removed used 100 grit sandpaper, Wes used some Bondo to repair the dent in the bottom of our tub. Bondo is typically used to repair damage on automobiles so we knew it could stand up to the water in the tub.
 Once the bondo dried completely, Wes sanded the repaired area with 100 grit sandpaper and then wiped down the entire tub with acetone to ensure that all the dust was removed and the surface was clean so there were no adhesion issues.
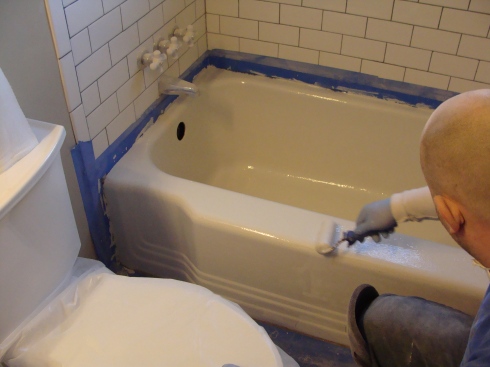
The next step is to apply the primer. We used a marine primer in white. This was for two reasons: (1) to ensure that the undercoat could withstand the water as well and (2) because the epoxy resin is clear. Whatever color you choose for the primer, will be the color of your tub. The primer was applied with a foam roller that is made specifically for these marine products. We only needed one coat to cover our tub thoroughly but depending on the condition of your tub, you could need two.
After the primer dried (we let ours sit overnight as well for a total of 16 hours), Wes lightly sanded with 600 grit sand paper, wiped with a tack cloth, and applied the first coat of epoxy resin.
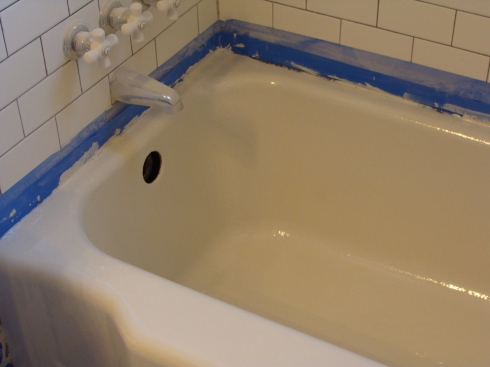
We used this epoxy resin with a hardener added and applied it with a foam roller made specifically for the epoxy resin. Wes coated the tub with one coat and waited for it to dry enough (the epoxy resin should feel like the sticky side of masking tape) before the second coat was added. Once the second coat is applied, we wait. Everything should be fully dry in about 16 hours (or until the tub is no longer sticky) and then it is ready for use!
But wait…it doesn’t stop there. One more step. The epoxy resin continues to cure and harden over the next week or so and will be completely cured after 2 weeks. Once the epoxy resin is cured, you will buff the service to smooth out the finish and give it that beautiful shine! We will be doing that step in the next few weeks so I’ll give more detail if necessary once we actually tackle it.
It may seem like a big job when you can just hire someone to do it for you but we saved nearly $300 in the end. If we could do it all over again, we definitely would!
Happy New Year! Ok, so it’s almost March now and well into 2010; however, tiling our shower is how we rang in 2010 in our house. I know seems crazy but when you have a few days off of work, it just makes you want to be productive. Naturally the bathroom renovation started with what I considered to be the most daunting task of all. Tiling. I think everyone has the initial fear of tiling when they have never tackled it before. I mean, this is definitely a serious DIY project that will show your mistakes. Thats why before we started anything, we researched, researched, and researched some more. I perused other home blogs, websites like the John Bridge tile forum, and the helpful videos from The Tile Shop (where we purchased our floor tile as well). After spending countless hours reading and reading and the reading again, we were able to narrow down what steps we needed to take for our particular situation. I won’t go through all the tedious details of how to tile a shower because you can find that elsewhere. What I will focus on are a few little highlights of what we learned and what worked best for us.
Our main concern when we started the bathroom overhaul was addressing the existing window in the shower. The previous owners just cased the window with standard painted wood just like you would in any other part of your home. Well for obvious reasons this didn’t work! The constant barrage of water kept the window damp at all times, leading to mildew and rotting. With the casing all wet, we could just imagine the disaster that was developing behind the tile underneath the window.
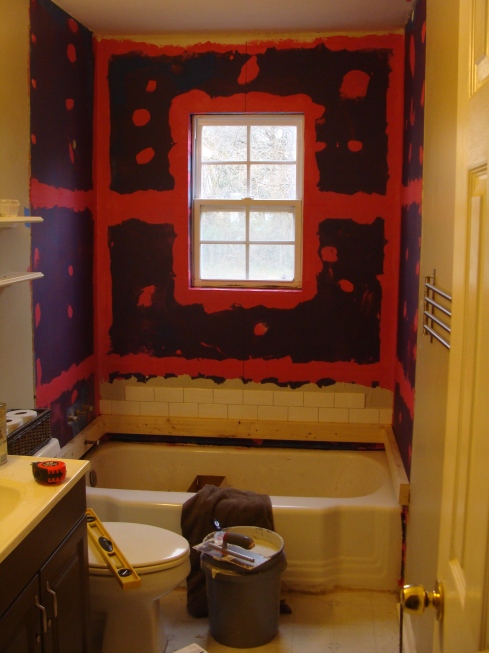
 So task #1 after removing all the old tile and drywall (yes, drywall…no backerboard for the previous owners…doh!), we took some extra time to correct the window. We did find a good bit of rotten wood and replaced all of it so that we could sleep a little easier. Then we went forward with installing our new moisture/mildew resistant tile backerboard which will also help me sleep a little easier. With the new backerboard in place and all our joints taped, we finished the night by applying an extra layer of protection…a little secret weapon called RedGard.
RedGard is magical. It is easy to apply, pretty much indestructible, and its pink. And what girl doesn’t love a little pink. RedGard is a waterproofing membrane. You apply this on top of your joint compound, screw holes, and any other area you are concerned about moisture. For example, our window. We slathered all the backerboard around our window with RedGard to create a seamless barrier that no water or misture could penetrate. At least thats what we are hoping for.
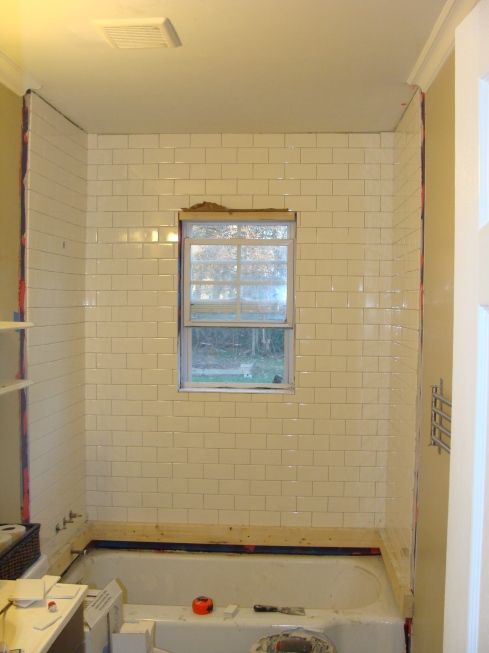
After that everything seemed pretty simple. Well maybe not simple but what we expected. We had done our homework and knew what to expect when it came to actually tiling. We planned our layout and just took our time. I think that is the #1 reason for our success. We didn’t rush, we didn’t argue, we didn’t cut corners. We did it correctly and patiently and ended up with this amazing result!


