Let me tell you, I am finally feeling a bit of relief. The main component of our nursery is complete and I can’t wait to share it with you! Hopefully this post won’t bore you to tears; it will primarily focus on how awesome and amazing my husband is.

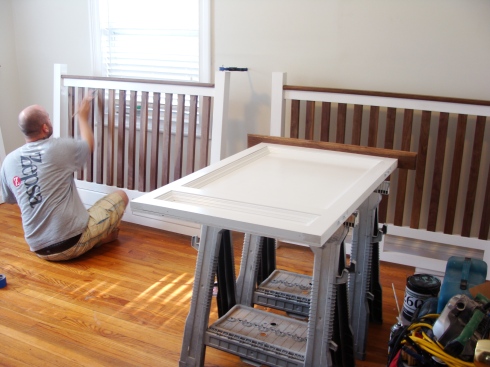
Wes and I knew from the beginning that we wanted to build our own crib. As most of you know, Wes is a custom woodworker and I definitely consider him quite the craftsman. We knew that we would sleep better at night knowing that the crib our daughter would sleep in was built by our own hands. That way we knew how sturdy it was and exactly the materials that were being used. You know, for those moments when she starts chewing on the rails and you start thinking “hmmm…I wonder whats in that paint she’s licking?”.

I started the design process for her crib a bit early. I actually designed the crib before we even knew we were pregnant. I put together full set of design drawings as a way to surprise Wes once we knew we were pregnant. The morning I got the positive symbol on that little test, I wrapped up those drawings and handed them to Wes over a cup of coffee. It was perfect. Now, at that time, the crib design was just my idea and certainly needed some woodworker/fatherly input. So Wes and I sat down together and hashed out all the details. Me from a design standpoint and him from an actual construction standpoint. The main focus was safety though. Our first step was to research all the U.S. safety requirements for cribs. We met all the strictest requirements which, again, helps us sleep a little easier at night.

Obviously after the design process was complete, I stepped out of the picture. Wes definitely ran this show.  He was able to purchase all the materials through work and do a good deal of the cutting there as well. It is always more efficient for him to work on projects at work since all the right tools are there and set up. It takes forever at home since he doesn’t have a workshop where his tools can stay set up. One day, honey. I promise!

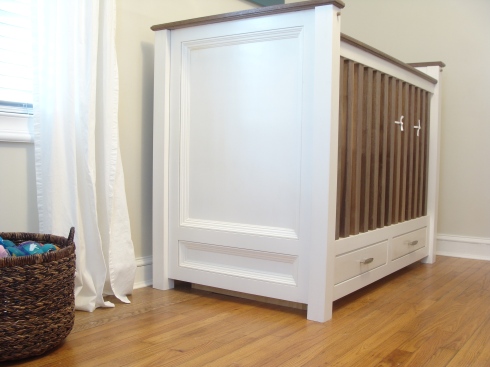
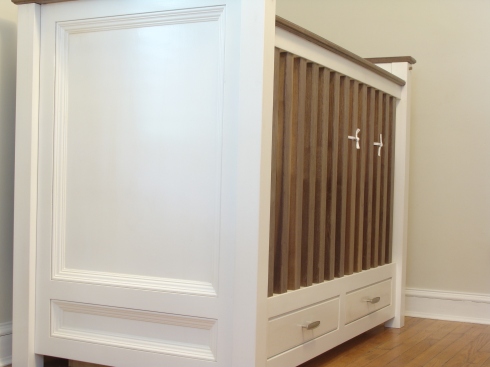
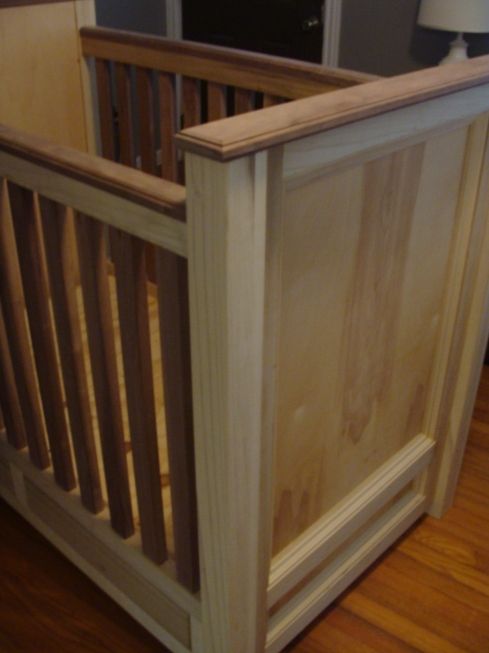
Over a course of several weekends and weeknights, Wes built the most beautiful piece of furniture I’ve ever seen. It can only be made more perfect by putting our little girl in it to sleep for the first time.

This was certainly not a quick project since we wanted it to be perfect and didn’t want to cut any corners. Wes slaved over this crib and we couldn’t be prouder. He constructed it, finished it, and put it all together. Built with love is the only way to describe this entire process.

Last we left off, I was telling you about our devastating water damage that slowed down our nursery progress tremendously. Luckily the husband finished off that work and we were finally ready to get down to business. Nothing like waiting until the last minute, right?!

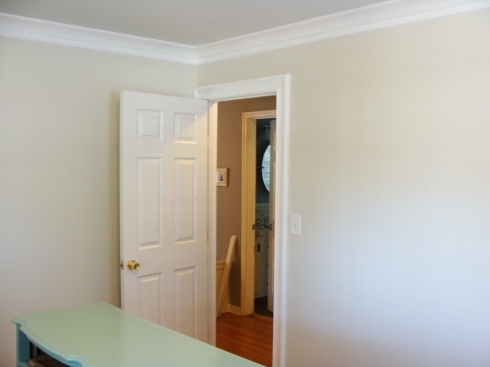
The next step was my favorite…painting. You know I love to paint and being pregnant and painting is no exception. First off, don’t worry. All the painting was doctor approved and in addition to that, we chose to use a no-VOC paint from Lowe’s. Valspar’s new no-VOC paint to be exact.  Naturally the painting took about a day because this girl needs some  down time in between coats to catch her breath. Here it is! (Ignore the crown in this photo, we will get to that)

Now I’m sure you are thinking…what happened to this? Well, the plan has completely changed. Is anyone really surprised? I know I’m not and neither is Wes. Although I still love the original plan, something wasn’t clicking. That’s when Wes suggested that we change the paint color to something more neutral. You know I love neutral and using a neutral paint in the nursery actually seemed like a great idea. That way  we could add as much color as we wanted in the fabric, wall art, and you know her toys will be colorful. This girl will certainly not be without color, don’t you worry. So we chose to go with Glidden – Meeting House which seems to be my favorite shade of cream ever. We also used it on our bathroom vanity and wainscoting. Its the perfect amount of creamiest. Not too yellow, not too gray. Love it!

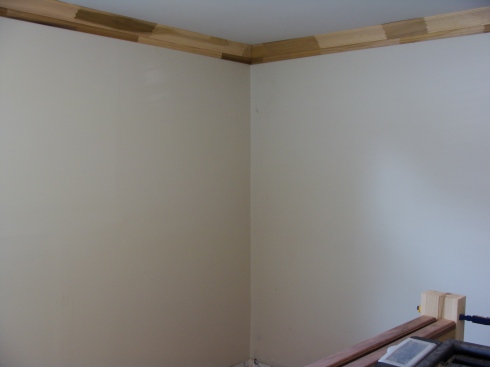
With the paint out of the way we could jump on to Wes’s favorite part. The trim. We replaced the window & door casing, baseboards, and the crown. For a little drama, we decided to go with a 2 piece crown and then similar casing and base as the rest of the house. Here is a peak at the trim prior to painting.

Wes was able to order all the casing from his work so it was significantly cheaper than going with HD or Lowes AND it was real wood. None of that particle board for our little girl. No, no, no. She gets the real thing. The one down side to real wood moulding is that it’s not primed. Sad. Luckily the husband took care of that step and was sweet enough to paint the finish coat as well so this pregnant lady didn’t need to climb on any ladders. Here is the result:

Love it! Doesn’t a room always look better with freshly painted white trim? I think it does.

Next up on the agenda: the crib. Wes has been slaving away and I can’t wait to share all the details!!!! Stay tuned.

Wes and I have been out of town for too many weekends in a row. Naturally all these little trips were in celebration of our little girl (translation : baby showers) which is wonderful but traveling seriously cuts down on your productivity level. We had one free weekend in the midst of our baby shower-palooza and we wanted to take advantage of it. So we woke up bright and early that Saturday morning with our game face on and dove straight in to our nursery to-do list.

Wes, of course, tackled the crib. This is our number one priority since baby needs a place to sleep once we return from the hospital. We don’t really have room for anything temporary in our master so that means her room needs to be ready to go once she arrives. So off he went to the backyard to continue construction on the crib. He had already cut most of the parts/pieces for it at work but now he needed to focus on cutting them to length and making sure that everything fit together properly.

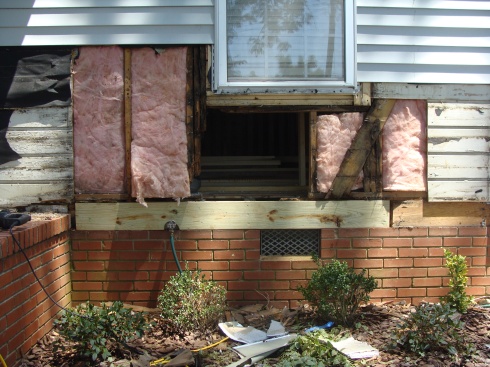
While he slaved away on the crib, I tried to make myself useful. I probably should have gone to get a pedicure and milked the whole “I’m growing a human being” thing a little more but I just felt too guilty. Instead, I tackled the existing trim in the nursery. As we have renovated each room in the house, we have replaced all the moulding (window casing, base, crown, etc.). The nursery was no exception. So with my trusty hammer and crowbar, I went to work. It was a pretty quick job with just a few minor holes left in the wall. It seemed pretty easy until I finished my work underneath the window on the front of the house. I easily removed the woodbase in this area. A little too easily. I noticed that the base seemed a bit moist and the drywall did as well. Not a good sign. So once Wes finished with his project for the day, I called his attention to my minor dilemma. He was instantly concerned and decided that the best course of action was to cut a section of the drywall away and see if there was any serious damage happening around the window.

Naturally, there was. You see, there are a few major components to framing, especially an exterior load bearing wall. Those major components were about 1/3 of the way rotted. As in no longer bearing any load. Heck, they weren’t even touching the floor any more. Awesome.

You could gently push on the wall and feel it bending. Not exactly the safety feature we wanted in our little girl’s room. That’s when Wes went into daddy/protector mode and started calling a few friends that are familliar with general construction. We were lucky enough that one of those friends agreed to spend his afternoon explaining to Wes how to solve this problem. It involved sketches, a materials list, and written instruction. We were so thankful for his kindness. We immediately went to Home Depot and priced the materials. Luckily we would only be in the hole about $150 if Wes did the work himself. Of course he needed to take (2) days off of work to actually tackle it but it was worth the sarcrifice.

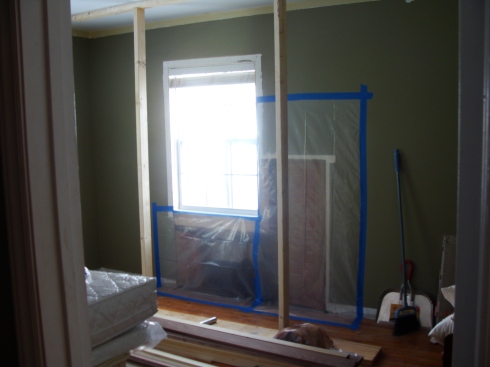
So Wes spent Monday and Tuesday of the work week completely tearing apart the nursery and the front of the house. He actually had to remove the siding and part of the wood floors in order to repair all the damaged wood. Neat. Here’s a little glimpse of what I came home to at lunch.

Super neat. Honestly, I was just glad my husband is handy enough to handle this all himself. We could of had some serious cash flow problems if we had to hire a professional. On a side note: how is it that the world just knows when you are trying to save some money for your new little one? First $2,000 to replace the catalytic converter in my car and now rotten framing. Seriously?! My nerves can’t handle much more.

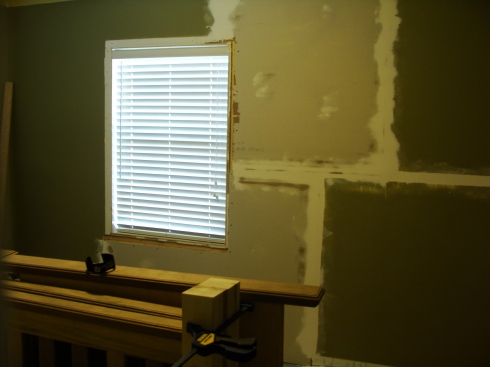
Anyway, Wes handled everything like a pro (of course) and we were able to remove all signs of rotted wood and seal the outside properly from the inside so we shouldn’t have any more problems. This added a few more things to the nursery to-do list like patching the wood floors and drywall but I suppose it’s a small price to pay for peace of mind.

Does any one else always run into surprises when they tackle a project? I feel like it must be us or maybe it’s just our house. Please tell me we aren’t the only ones!

Yes, I just pulled an early 2000’s rap song out of my arsenal as a blog post title. I am pathetic. Or if you are my mother, you think that I’m a bad speller.

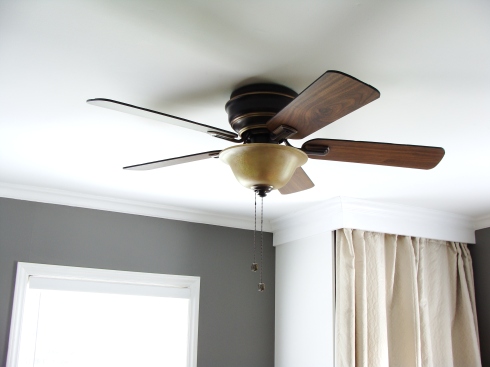
I have a confession to make. I’m a designer and I use ceiling fans. I know that most people including other bloggers and every designer on HGTV will shun me for this but it’s true. I use ceiling fans. Sure I love the look of a chic and modern light fixture from (insert decor store here) but sometimes they just aren’t practical. Especially when you are 7 months pregnant and it’s over 90 degrees outside. Thats why when the time came to get rid of our master bedroom builder grade “boob light” we opted for a ceiling fan.

Now I do have some standards. It couldn’t be just any ceiling fan. It still needed to have a little bit of style and coordinate with the rest of the room and last but not least…not break the bank. We are saving up for a certain someone’s college education, you know. So we wandered through the aisles of Home Depot and found this beauty for $65 smackers.

It had walnut blades, an oil rubbed bronze metal finish, and it was only 44″ which was the perfect size for our petite master.

We snatched this baby up and Wes had it installed within 20 minutes. I was on standby to hand him any necessary tools but ultimately it was a one person job.


What do you think? Do you use ceiling fans or did Trading Spaces brainwash you to think that they were a cardinal sin?

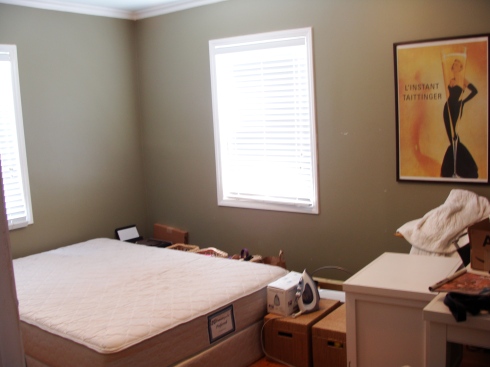
What would you expect (2) people to do who are 12 weeks away from expecting their first child? Thats right, work on their kitchen renovation! I know it seems a little out of whack but you should know by now that (a) we take far longer than most people to finish projects and (b) we are crazy. I can defend our kitchen renovation timing though. Let me remind you of this sight:

Thats right, half of our kitchen appliances were being stored in our future little girl’s room. In order to empty this room out and get it ready for baby, we had to complete our kitchen renovation.

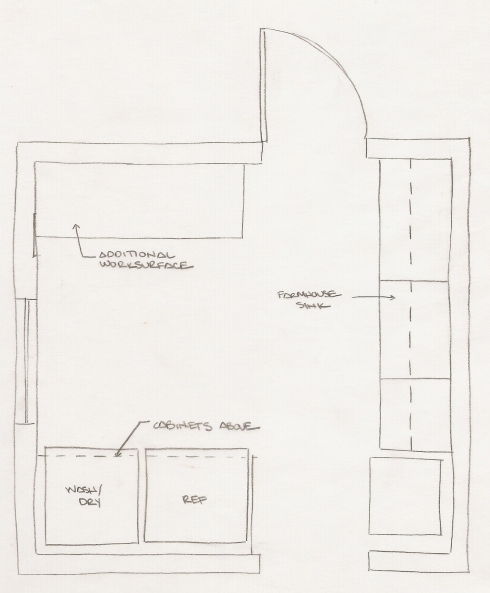
Over the long Fourth of July weekend the hubby got to work and I got to painting (doctor approved of course). If you can recall from many moons ago, we planned on this layout for the kitchen.

And if you can recall again, we only completed one wall during our Thanksgiving holiday renovation.

So with an extended weekend, Wes built the rest of the cabinetry and I painted the base/casing that had remained in it’s primed state from last year. If you can’t tell, I’m hanging my head in shame. The first project completed of this weekend was the painted casing/base. We already had the paint which meant no supplies had to be purchased and it took about (2) hours to complete. Why on Earth had we waited so long?! We are infamous for putting off projects that take nearly zero time and give the most satisfying results. Nothing better than some bright white trim don’t you think! And while I was in the painting zone, I decided to paint the walls too. Ok, that is a little embarassing to admint as well. This is the third paint color since we renovated but I am 100% in love with this choice now. Third time’s a charm, I guess. This go round we settled on Arcadia by Glidden which is a lovely grayed down green. In love!

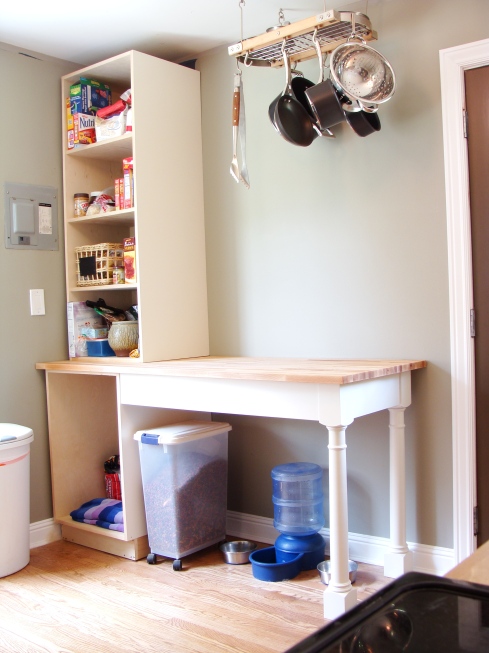
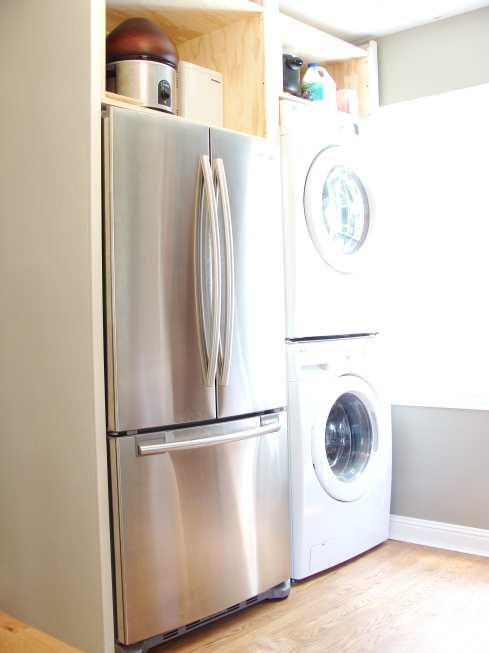
So while I completed my projects, Wes completed his. He not only built the cabinets to surround the washer/dryer and refrigerator for a more built-in look but he also…wait for it…purchased the additional butcher block countertop for the other side of the kitchen. It only took (6) months for Ikea to replenish their stock. That doesn’t seem ridulous at all. Sarcasm intended. So that purchase meant we could install the cabinets that Wes built months ago on the opposite wall from the washer/dryer/refrigerator as well.

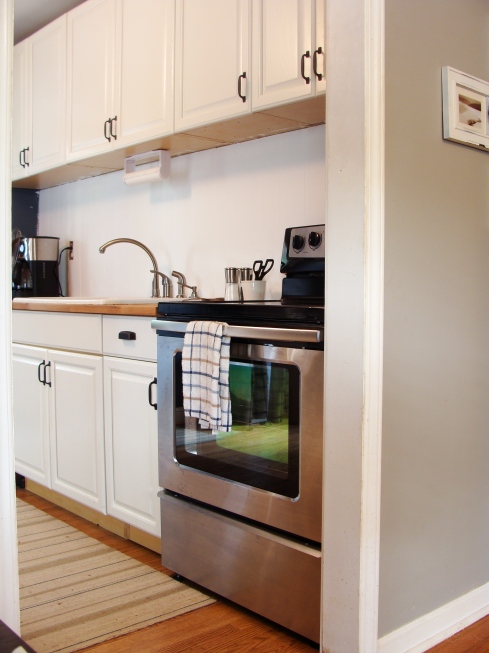
So without further ado, here is our kitchen today.

Now the only things left for this room are cabinet doors and crown moulding. The crown will be installed around the top of all the cabinets as well as the walls so all the gaps you see will be covered. Wes will be making the cabinet doors at work on his fancy equipment and we will just worry about those later. My main focus was to get cabinets for all the miscellaneous kitchen things that were living in the nursery. Baby can’t sleep next to the crock pot. I’m less worried about covering everything up in the cabinets. We will get to the doors eventually.

So thats how we spent our holiday weekend. As one of my lovely commenters declared once, we are not just weekend warriors, we are holiday weekend warriors. I like the way that sounds. 🙂

We are officially at the 15 week mark until our little girl’s arrival. That is so exciting and frightening at the same time considering how we have made zero progress on the nursery. That is, until this past week. Now it may not seem like a lot to most people but I am starting to breathe a little sigh of relief.

What exactly did we accomplish you may ask? Well, we planned. That’s right, I finally sorted through this ADD design brain of mine and landed on a design. My biggest struggle was incorporating color. Now I love color don’t get me wrong but as I look around my house, I’ve become quite the “Neutral Nancy” if I do say so myself. I love the neutral vibe of our home but it really doesn’t fly in a nursery. Not that I want a festival of pastels either but this little girl needs a little oomph in her room. I had an idea for teal walls from the beginning. I finally got the husband on board (which was more of a challenge than I anticipated) and we started from there. Paint color is not where I usually recommend starting but hey, I’m a rebel. A rule breaker. I am the queen of taking risks! If you know me, you are probably laughing out loud at all of those previous statements.

So the color was set but deciding on the rest was when the challenge really began. I didn’t want a theme and I didn’t want it to be overly childish so I was at a bit of a loss on where to begin.  I’m not sure you realize how much gross children’s “stuff” exists in the world. Why must everything have big cartoon animals on it or “I love my mommy & daddy” tattooed across it? Maybe I’ll feel differently once this little girl is actually here but for now, the designer in me was screaming “DON’T DO IT!!” There will be plenty of time for cartoon characters later. For now we focus on a fun space AND a little design thrown in just to make Mommy feel better. 🙂

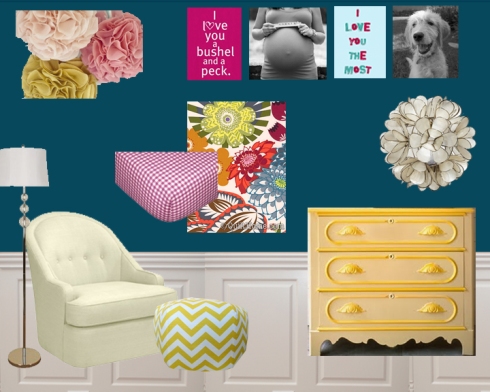
Here’s what I came up with:

And here’s a breakdown because I love lists and bullet points:

  • Teal walls with white wainscotting below (courtesy of Wes of course)
  • Floral fabric for a DIY crib skirt. That is, if I can teach myself to sew in the next 15 weeks.
  • Fuchsia Gingham crib sheets
  • Yellow Chevron Ottoman from Etsy
  • Light Fixture
  • Fabric Pom-Poms: I’m thinking of putting these over the chair or over the crib. Haven’t decided location, just that she needs them.
  • Dresser: An old dresser painted a fun bright yellow
  • Art above the dresser: We’ll use a mix of photographs (family, friends, dogs) and graphic art (some of our favorite family sayings). Two of the phrases already decided: “I love you the most” (this is something Wes and I say on a daily basis) and “I love you a bushel & a peck” (my grandmother use to say this all the time)

So obviously there are still some outstanding items like the rug, chair and curtains but we are well on our way. Even more on our way than you think. Look at what we picked up just last weekend.

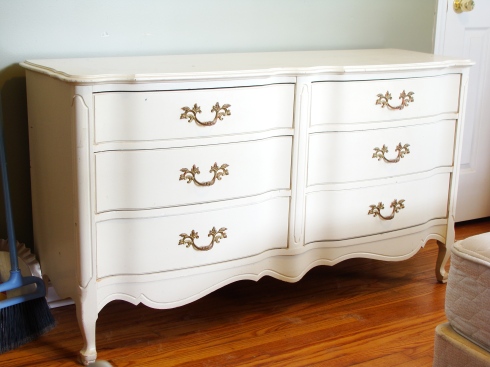
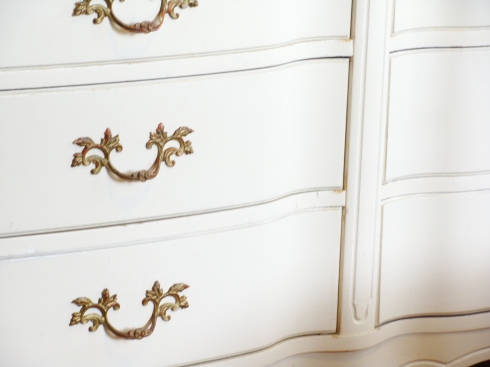
Thats right…the dresser. And not just any dresser. This is the exact dresser I had in mind and we found it on Craiglist for $40! It is perfect. Perfect shape and size. I can’t wait for the husband to get his hands on this one. It’s going to be beautiful. Just look at these details.

So thats where we are for now. Certainly not close to finished but certainly well on our way.

What have you planned lately? Any projects that have a very specific due date that you’re tackling?

So with all the posts I’ve done over the past year, there is one room that you have never seen. And there is a very good reason for that. It is affectionately referred to as…the junk room. You can only imagine that there isn’t much to show off in a room with that nickname. Here is a very embarrassing glimpse at what you could expect to see any day of the week (other than when we speed clean before company arrives):

Simply tragic. And disgusting. And full of garbage. This is the catch-all room and the dog sleeping room and don’t forget the home of our microwave until our kitchen is finished.

So why am I bringing up this embarrasing room now?

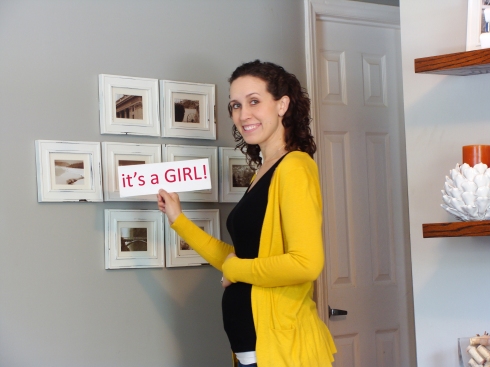
Thats right…we’ve got a little one on the way! I am officially 21 weeks along and it’s time to start working on the nursery. This room has to transform into an organized and peaceful (and not to mention clean) place for our beautiful baby girl by the end of September. We definitely have our work cut out for us to say the least.

The only things set in stone so far are the following:

  • Wes will build the crib (collective “awwww” please)
  • We will paint the walls
  • There will be room for a baby

Yep, those are the details. Excited yet?!

So obviously we have a ways to go on the planning process but I’m working hard/wasting A LOT of time on pinterest collecting images and putting ideas together. I will OF COURSE share all the details along the way but for now I’ll leave you with this.

Pure cuteness. I mean, did you see that nose?! Yep, she’s got me wrapped around her little finger already.

As if you hadn’t noticed already, we’ve been taking a bit of a break around here. Or at least a home improvement break. There has been a lot going around here including side projects and family visits which has left us with zero time to DIY. Not only DIY but more specifically finish the kitchen. Last we left off, we were looking a little something like this.

And it stayed this way for A…LONG…TIME. Finally Easter rolled around and I had the brilliant idea to invite friends over for lunch. With that motivation and my impeccable skills of persuasion, I convinced the hubby to finish the upper cabinet doors and install our on-a-budget backsplash. It must be the dinner I cooked or the movie I let him pick because he actually did it! He is my hero. So while I scrubbed the house from top to bottom (we are talking cleaning baseboards and moving furniture that hasn’t been touched in months), good ole Wes finished the kitchen cabinets.

Love it! It really made the kitchen feel so much more open and the ceilings feel sky-high with all that white and not to mention that the cabinets are installed right up to the ceiling. As I mentioned above, we went for a on-a-budget backsplash which translates to…beadboard. We had a leftover package of v-groove beadboard from an abandoned project last year and one of us (honestly can’t remember which one of us but I’ll gladly take he credit) had the brilliant idea to use it as our backsplash. We used a little construction adhesive along with a few finishing nails and voila! Instant backsplash. We went for white paint in a semi-gloss finish to keep things bright and easy to clean. Total backsplash cost … $30. Try and match that with tile!

We obviously still have details to tackle like trimming out the backsplash, install a fascia board to cover up the bottom of the cabinets (hence why we weren’t worried about the white paint that got on it), and install a shelf for the regularly used items we want within easy reach. That will come eventually. We are just excited to have all our dishes covered up so we don’t have to look at the mish mash of serving ware we have acquired over the years! How do people have matching dishes that can be displayed on open shelves?! Maybe I’m just too cheap to shell out the cash for a matching set. Whoops, got off topic there. Moving on.

So that sums up semi-completion of ONE wall in the kitchen. That sounds so sad when I read that. All this time and only ONE semi-completed wall. Oh well, moving on…we have a real problem on our hands besides our lack of free time. Ikea. Yes, Ikea is the thorn in my side. As I mentioned previously, we are going to install another prep area on the opposite side of the kitchen.

In case you forgot, our Lagan butcherblock countertop is out of stock at Ikea and has been for quite some time. Its been months now and still no countertop and no estimated arrival date.  What is a girl to do?! Google. I googled because there had to be some other irate people out there in need of a countertop and I found many! In one of the MANY threads, someone mentioned that Ikea was having trouble with their distributor and may never have that countertop back in stock again. Most devastating news ever.

So that’s how we ended up back at the countertop drawing board. Do we use a totally different countertop at this new section or just chuck our current countertop and start new so that everything matches. We’re still torn but I’ll post with our decision once it’s made. What do you think…different materials or trash the $60 countertop and start fresh?

Wes and I have been in a mad rush to get the house in order since we learned we would have several weekends in a row of house guests. Nothing like a little pressure to light a fire under you! So with the guests arriving this weekend and next we did what most people do…paint the kitchen. Ok, so maybe that’s just me.

Well, as most of you know I love painting and I love painting rooms over and over again. Love may be a strong word but I certainly do enjoy getting the perfect color on the walls. Ever since I painted the kitchen during our renovation, I felt less than enthused about the choice. It just didn’t have the punch I was looking for and with such a small kitchen, I could use all the help I could get in the punch department.

This is the less than ideal before:

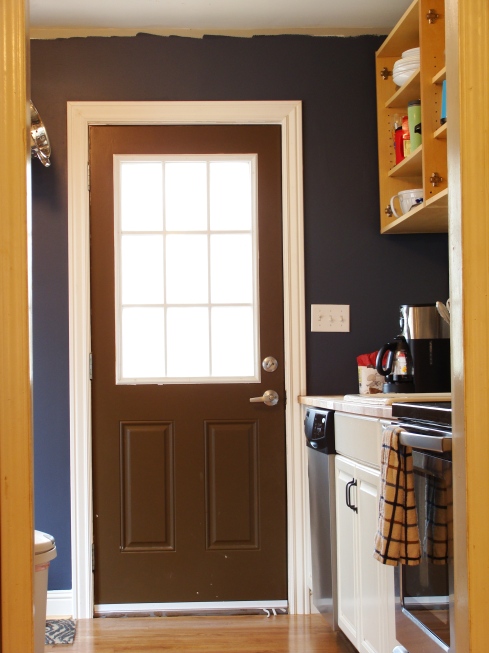
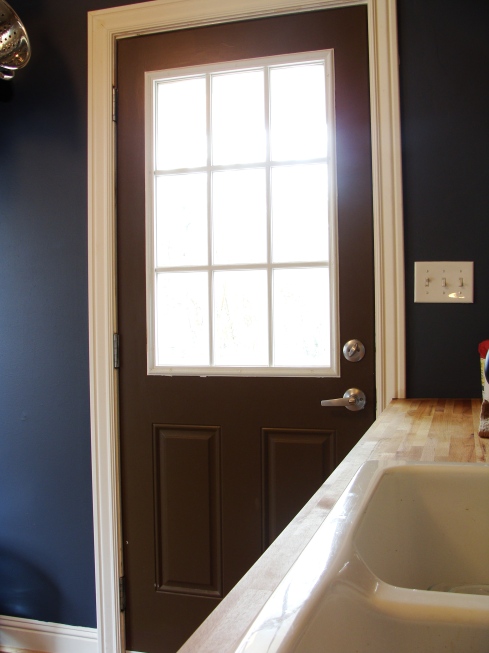
So where did my color daydreams begin? Blue. I have always loved a blue kitchen. Any shade really…gray blue, pale blue, slate blue, navy blue.  So I scoured my multiple paint decks and kept coming back to the same thing. Navy Blue. I just loved how deep and rich the color could be while really letting the white cabinets pop which was the problem with the current wall color. So I stumbled upon a reject sample from the bathroom reno and slapped some Glidden Blue-Green Slate on the walls. Don’t let the name fool you, it’s navy blue. And beautiful and perfect. So I had our local Lowe’s match it to their no-VOC Olympic paint and went to town. Two coats later and we had this:

Do you love it? I do! It took a few days to get used to how dark it is (just because the paint color before was so light) but now I can’t imagine it any other way. It transitions so nicely from the smokey gray walls in the living room and works nicely with the warm wood countertops from Ikea.

The next mission is to assemble a runner (yes, that means carpet tiles) in front of the sink. I’m thinking about this bad boy.

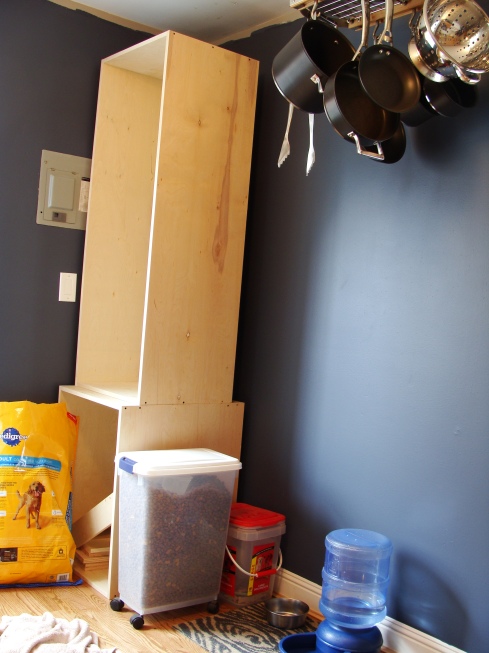
Then we construct the rest of the cabinetry. Wes started a few weekends ago but unfortunately the countertop is out of stock at almost every Ikea. Sad. So we wait but at least it is built and ready for install!

Thats probably all we will be able to handle before the guests arrive. Maybe we will find time to patch the big hole in our hallway drywall (more on that later) but we’ll see. There are only so many hours in the day and we both like eating and sleeping too much to let DIY projects get in the way of  that. Oh, and netflix marathons too. Dexter anyone?

As I’m sure you have noticed, things have slowed down a bit over at Out of Square. Not sure that I have much of an excuse except that we are tired. Pretty lame but true. After working furiously on our kitchen and trying to clean up the mess we left behind, we just needed a little time to unwind and enjoy each others company without being covered in demolition dust. We still have a ways to go on the kitchen but it’ll be finished sooner or later. We are waiting until the weather improves a bit so that the hubs can build the additional kitchen cabinetry and paint the cabinet doors without freezing to death. So while we wait for the spring temperatures, we live with this.


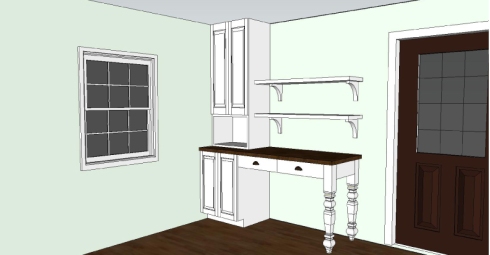
Far better improvement from before so I’m not complaining. In the mean time though, we are having a little design fun. As you may (or may not) recall, we are planning on adding some additional cabinetry on the side of the kitchen which formerly housed our gigantic refrigerator (right in front of the electrical panel). Since we went ahead and purchased the stacking washer and dryer (thanks Mom!) and moved the refrigerator to the opposite side of the room, we now have a whole wall open for storage and counter space. As you can see in the above, we are in dire need of more surface area. The 30″ of open countertop just isn’t cutting it any more. So after much googling, blog reading, and brainstorming, we came up with this.

One snowy afternoon, we cuddled up around my computer and using my newest obsession, Google SketchUp, we created this. Here’s what you are looking at: Upper cabinet for pantry purposes (we have no pantry currently), middle shelf open for microwave, and bottom cabinet for pull out trash can and possibly some more storage. To the right we will have a few drawers underneath another lovely Ikea butcherblock countertop with open shelves above (for glass containers to store sugar, flour, etc.) and last but not least, open underneath for the dog’s feeding/drinking area.

This entire area is going to make our life 10 times easier I tell ya! I can’t wait until we get this started. Wes is going to create the cabinet doors at his shop to match our existing one’s (so we can have custom sizes instead of stock items at HD) and we have already ordered the legs from www.tablelegs.com. They don’t look exactly like this but you get the idea. To think that we had this much additional storage and prep area that we have been missing out on for 4 years!

So enough about us and our plans, have you scooped up some extra storage space in your home that you don’t know how you lived without?! Do tell.

Product Love